
Resizing Tattoo Designs
The Adobe PDF Designs purchased from StockKanji - Japanese Calligraphy Designs can be easily resized. Below we show how to do this in detail.
 The designs are copyright protected for a single use and cannot be edited or distributed - meaning you can't use the image on your website or re-sell anything that include the images or the images themselves. But you can use the design for personal uses in crafts and projects and a tattoo design.
The images are high resolution so you can even print the art onto nice paper and frame it! The design is perfect for scrapbooking, gift cards and even simple works of art - you cannot sell these commercially or distribute these designs - but for personal use these are perfect. And the matching stencil are great for use in crafts.
Summary
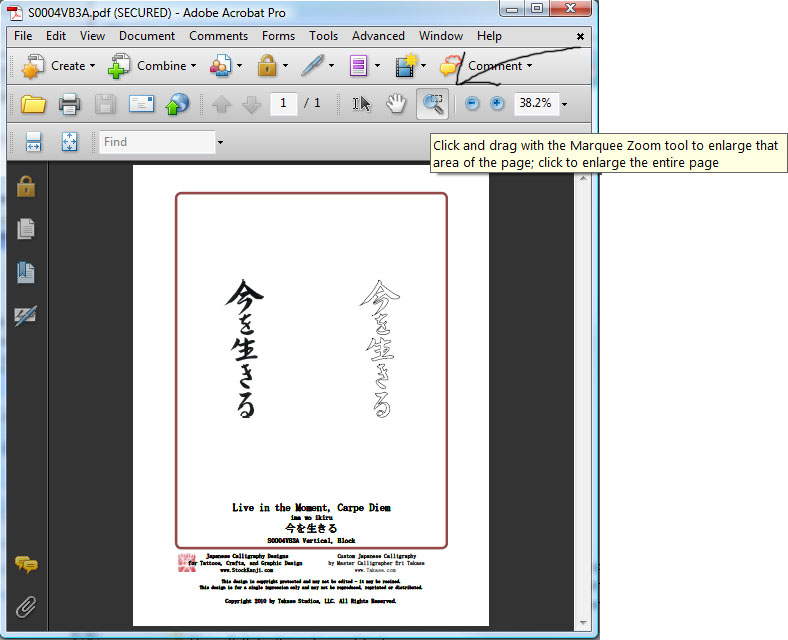
0) Open the design (experiment on Live in the Moment (ima wo ikiru))
1) Select the Marquee Zoom Tool
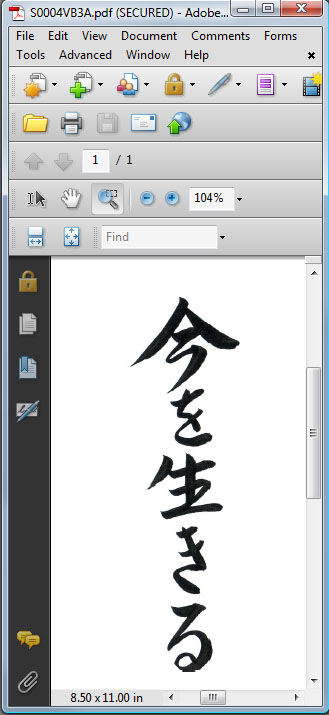
2) Select the part of the design to enlarge
3) Reposition design to fill window
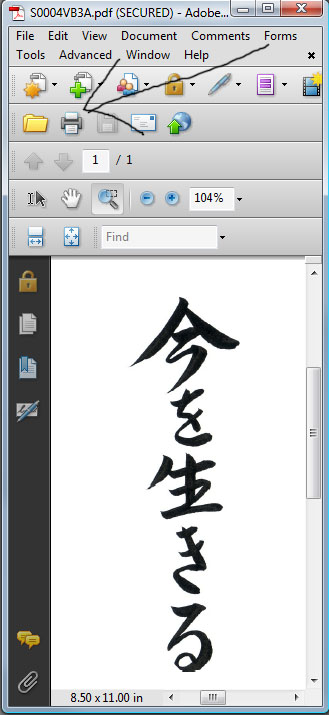
4) Select Print
5) Select the follow Print Options
a) Print Range to "Current View"
b) Page Scaling to "Tile all pages"
c) Tile Scale to the size you would like the design.
6) Print by selecting "OK"
Step by Step Instructions
0) Open the design
If you do not have the latest version you can install it from from from Free Adobe PDF Reader.
Open the design by clicking on the design link:
Live in the Moment (ima wo ikiru)
This can be used in all kinds of ways for your personal needs - Christmas gifts, scrapbooking, cards and so on. If this is for purely personal use then the Adobe PDF format is perfect. If you are looking for commercial uses, for example you need a design you can edit for marketing materials, then we offer commercial use formats. See StockKanji.com for more information.
For personal use these designs are AMAZING!
1) Select the Marquee Zoom Tool
2) Select the part of the design to enlarge

3) Reposition design to fill window
Here you might want to resize the window and using the slide bars on the right and bottom of the window to center the design. Ideally you want the design to fill the window with little or no extra white space.
4) Select Print
5) Select the follow Print Options:
a) Print Range to "Current View"
b) Page Scaling to "Tile all pages"
c) Tile Scale to the size you would like the design
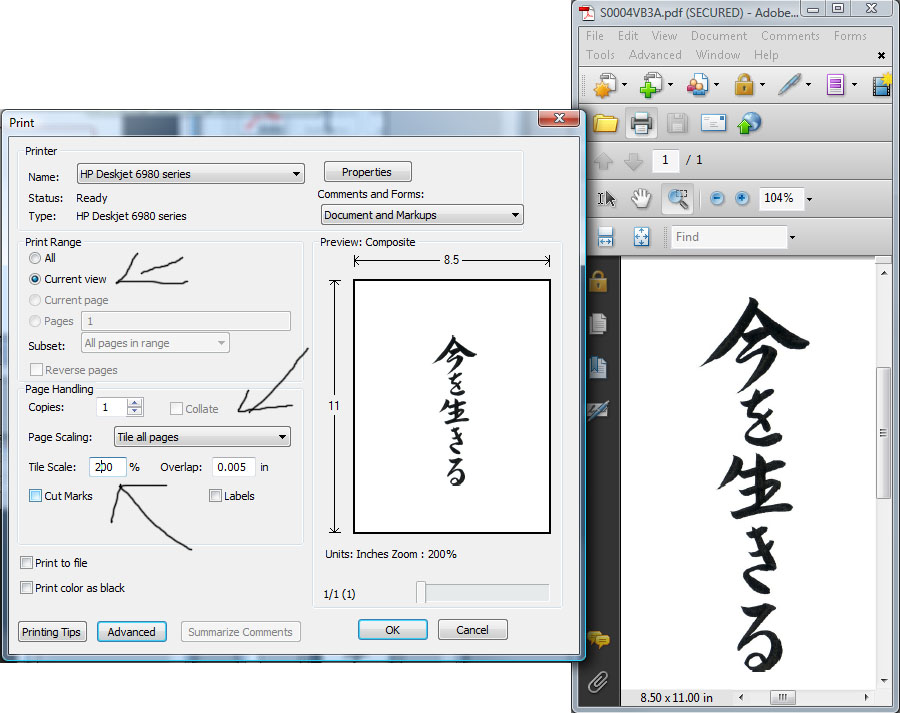
6) Print by selecting "OK"
Printing on a nice paper this can be a work of art by itself!
Notice that your resized design will print crisp and clear.
And you can make as many changes to the size as you want. You can either keep changing the size in the current window or save the file to your computer to work on later.
I had ordered a tattoo from Eri but the link wouldn�t pop up on my browser, I contacted Eri and explained what happened, and she was so quick to solveMore »
Haylee